Secure React and Vue Apps Using Keycloak
If you just landed here, this article is the second article on securing applications with Keycloak.
In the last article we go over some concepts of identity access management including authentication, authorization and Role Based Access Control.We had an introduction to Keycloak structure and how it can help to achieve desired behavior in a centralized way with minimum code.
You can review the first article here for a refresher. If you know the concepts already you can continue with this self contained article.
In this article we will go over a step by step tutorial to create our instance of keycloak and configure it to secure both a Vue app and a React one.
Keycloak configuration
Running Keycloak
There are multiple ways to run keycloak:
- As a Java application
- As a Container
- Running on Kubernetes
For production purpose keycloak should be connected to a database to keep the data stored properly. For our purpose, we will skip this and keycloak will be using an in-memory database (H2). So you don't need to worry about that.
I'll use the simplest and less configuration method which is running it in a container on your machine.
NOTE: You can use podman command in place of docker depending on your environment
docker run -p 8181:8080 -e KEYCLOAK_USER=admin -e KEYCLOAK_PASSWORD=admin quay.io/keycloak/keycloak:14.0.0
You will start seeing some log messages printing on your screen. Wait till you see the log has stopped running and those 2 lines are printed:
17:59:42,872 INFO  [org.jboss.as] (Controller Boot Thread) WFLYSRV0060: Http management interface listening on http://127.0.0.1:9990/management
17:59:42,872 INFO  [org.jboss.as] (Controller Boot Thread) WFLYSRV0051: Admin console listening on http://127.0.0.1:9990
Congratulations .. Your Keycloak server is up and running.
In your browser, go to this URL: http://localhost:8181
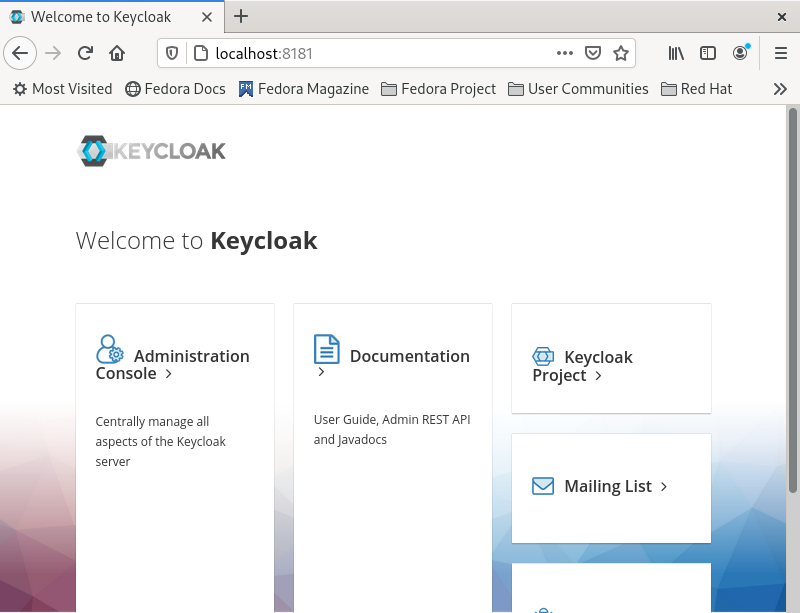
Click on Administration Console and use the following credentials:
User : admin
Password : admin
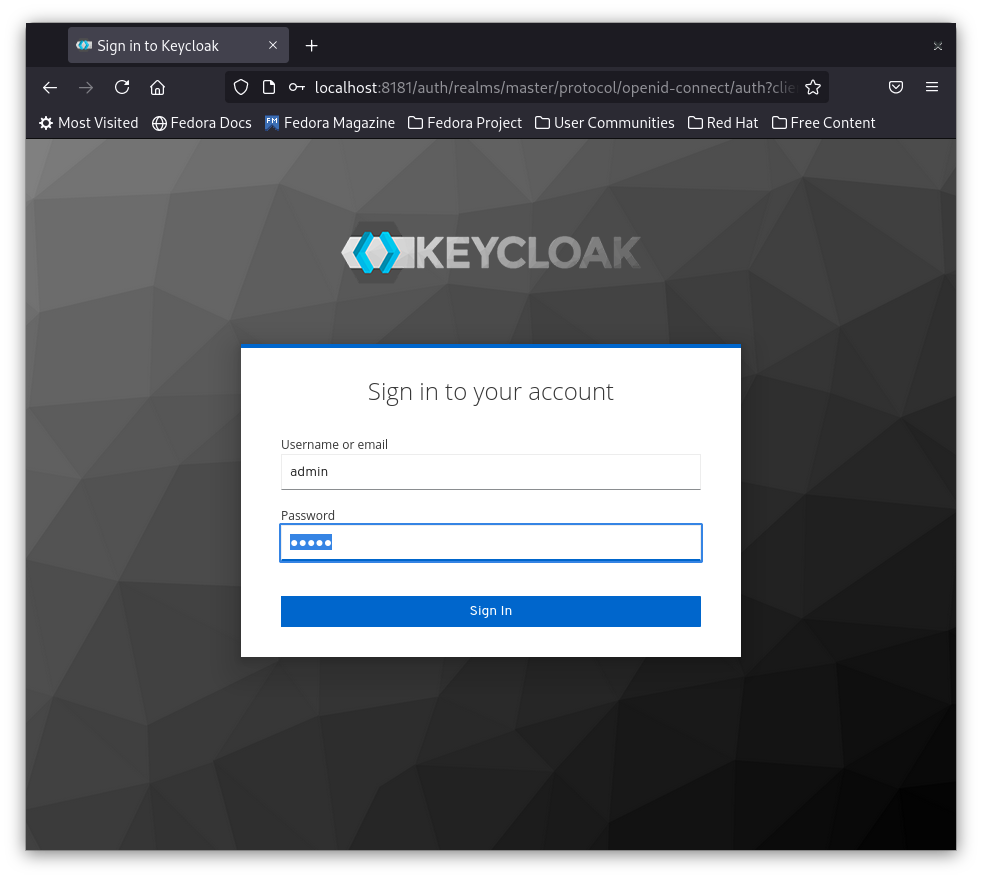
Add a realm for your application
You can use one keycloak server to secure multiple applications. This can be achieved by realms. Each application has its own realm with users, groups and roles totally isolated from the other applications.
The default Master realm is used to manage keycloak, so we don't wanna mess with this.
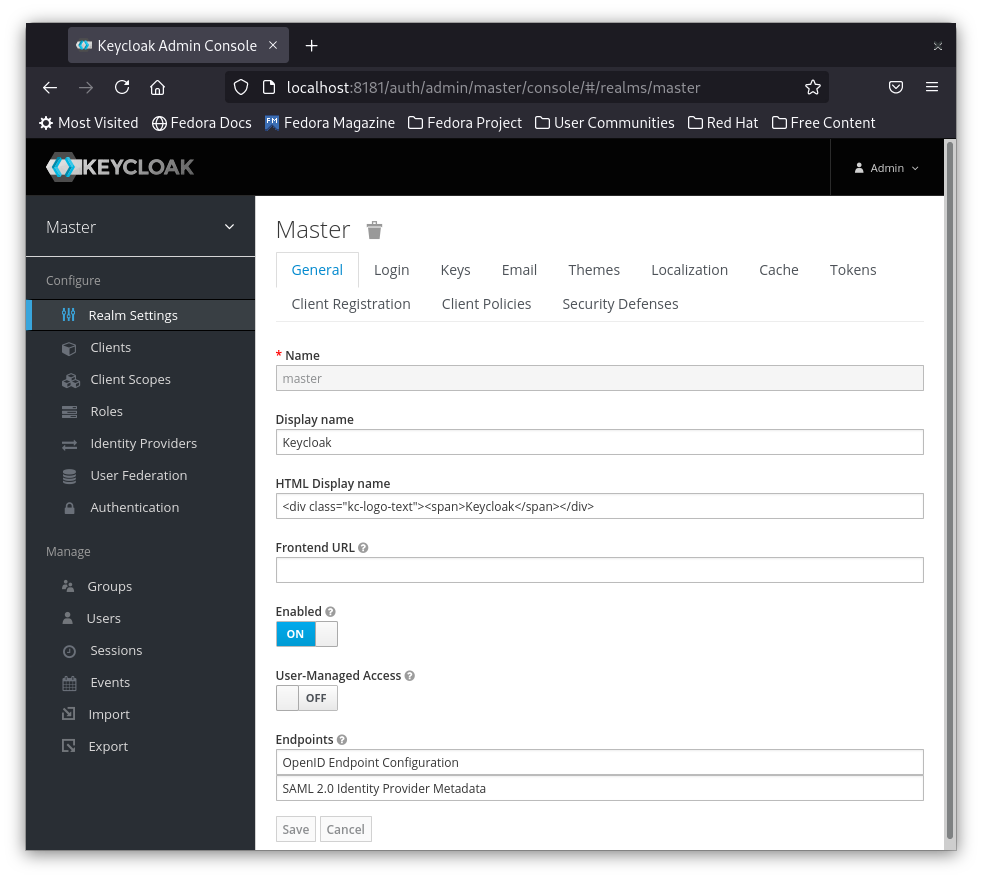
Now from the left menu move your mouse over the Master and you should see Add realm Button
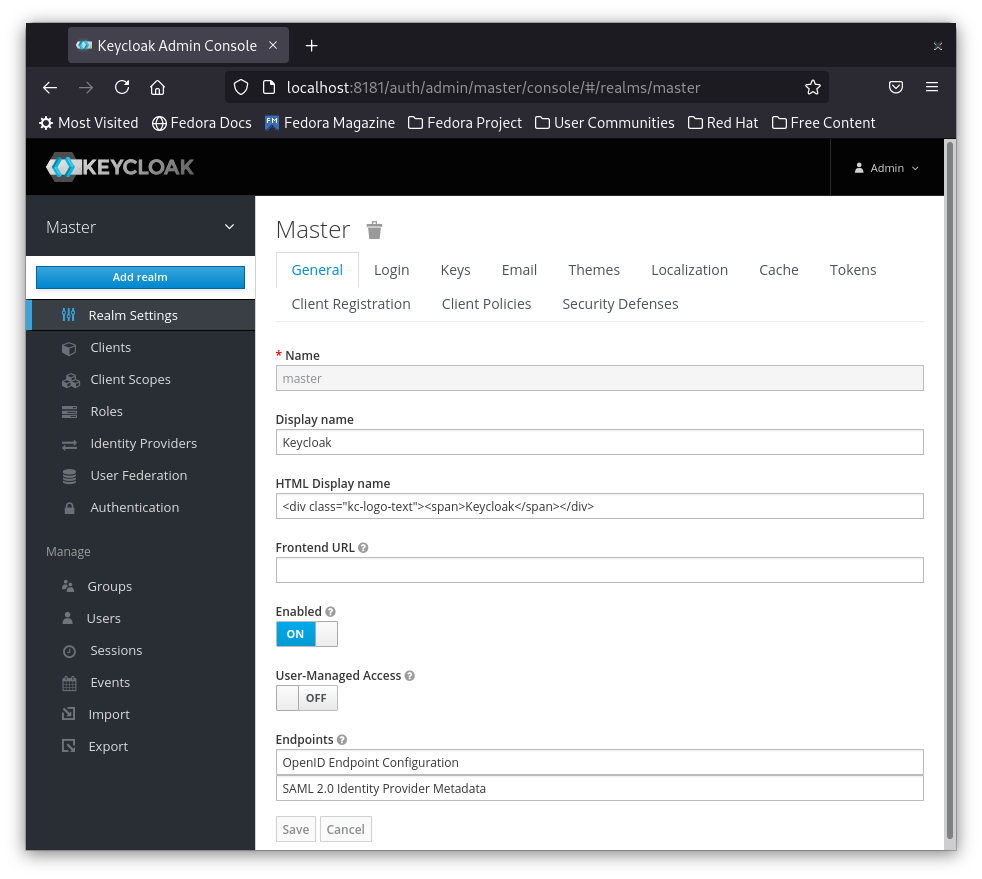
Click on Add realm button and you will be directed to add the new realm name
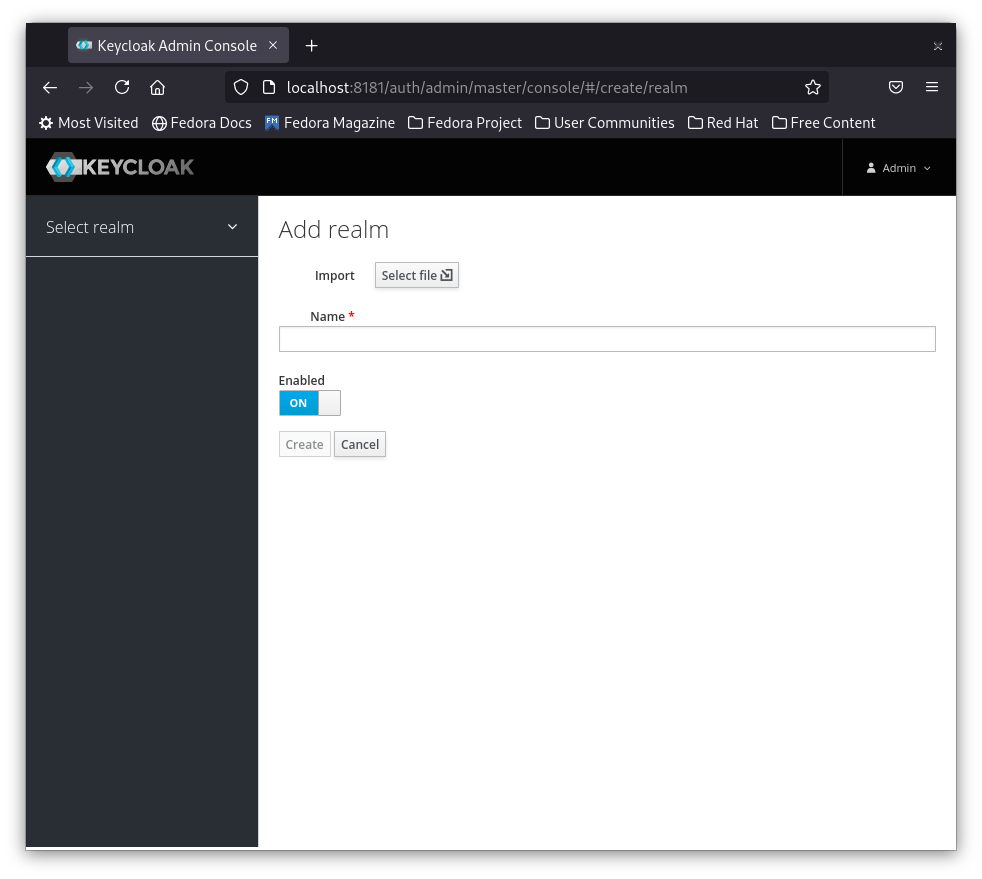
Enter secured-app in the realm name and then click the create button
I also added a Display name that will be shown on the login page when displayed to the application users.
Don't forget to hit the save button once you finish adding the settings.

Create a user
We need to create a user to be able to use it for login later
1- On the left hand side menu under Manage click on Users

2- To add a new user click Click User Button
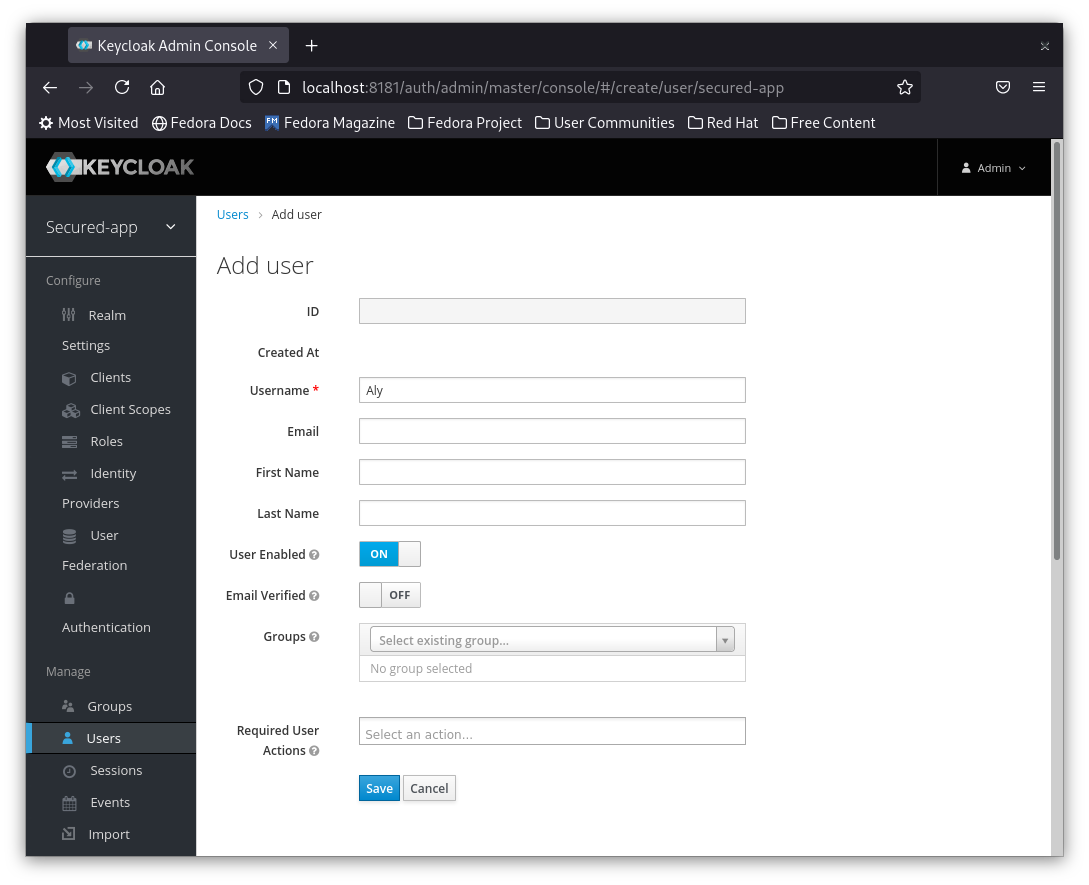
3- Add your user credentials to the user so he can login.
Add password and Password confirmation
Note: Make sure to set Temporary to Off, otherwise the user will be asked to enter a new password after using the temporary password that we set.
Note: You have to click Set Password Button, otherwise the password will not be set.
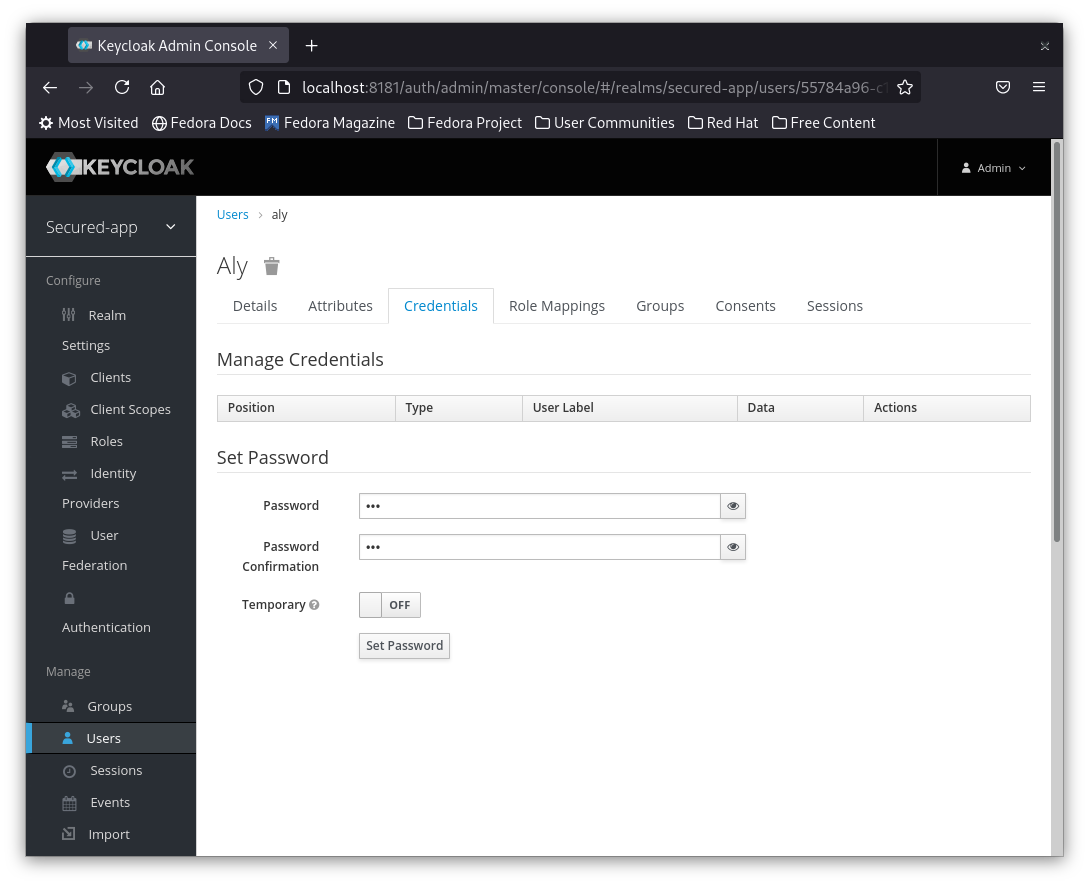
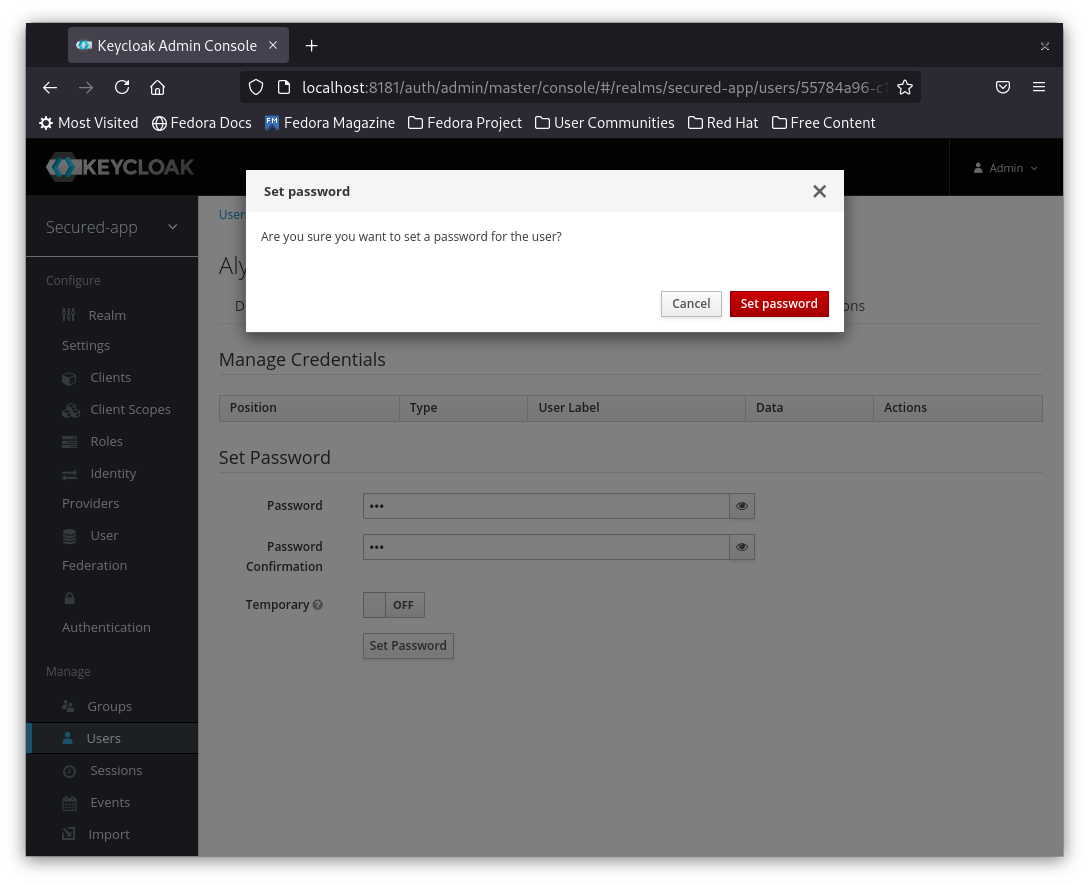
4- Confirm the new password byt clicking on the Set Password Button and then confirm the dialog.
Create Client
Clients are used by the applications to connect to Keycloak. It is better to create a new client for each separate API or Frontend application. Can be one for web apps, one for Android and other for iOS.
In this tutorial we are creating 2 different front ends one with React and another with Vue so I will create a client for each one. Let's start by creating the Vue client.
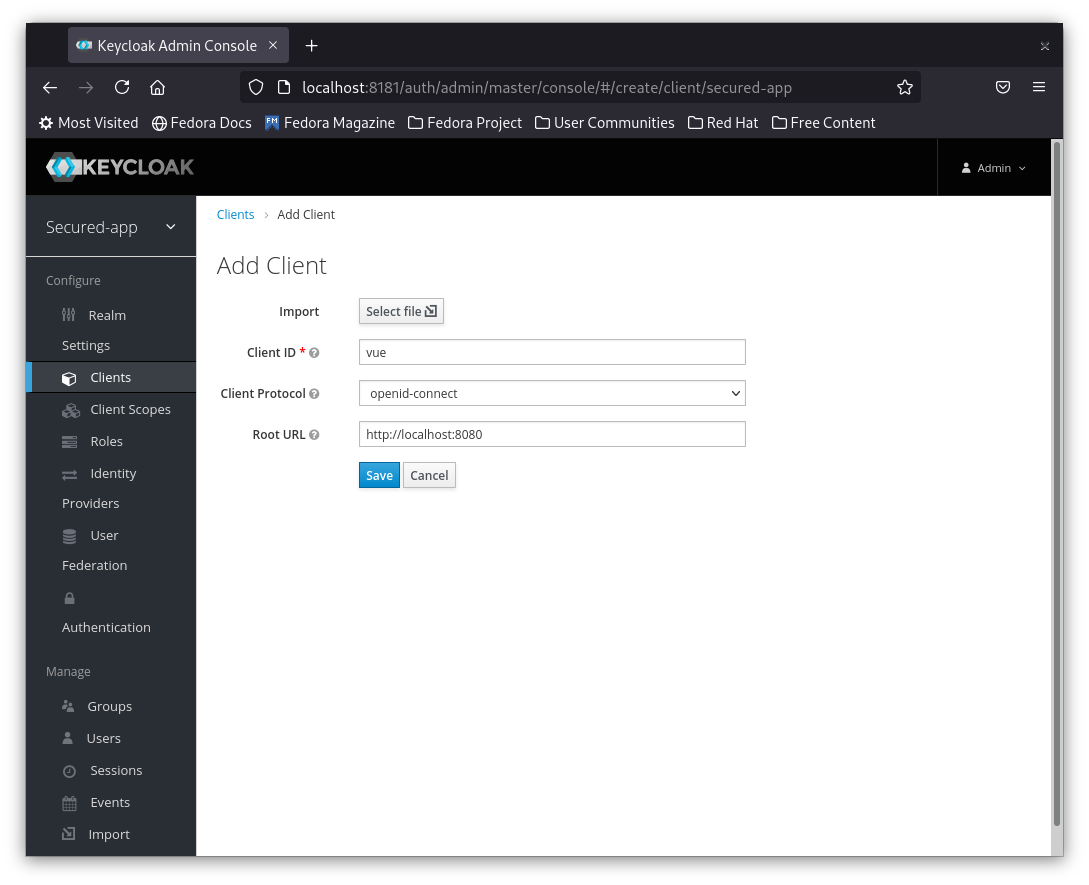
1- From the left menu click on Clients

2- On the right hand side click Create
Enter the client name, this can be any name, I am gonna call it vue for simplicity.
Leave the default Protocol openid-connect.
In the Root URL enter the application url. in my case my default vue url is http:localhost:8080
And then hit the save button
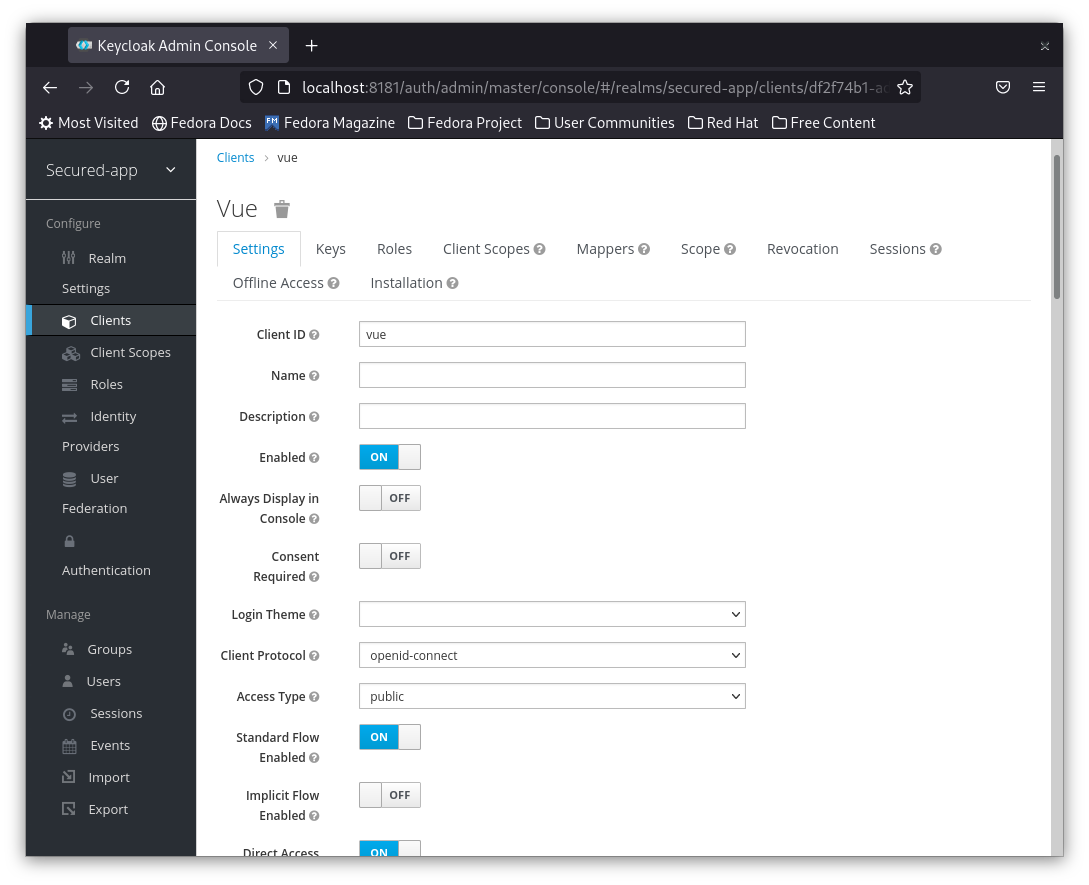
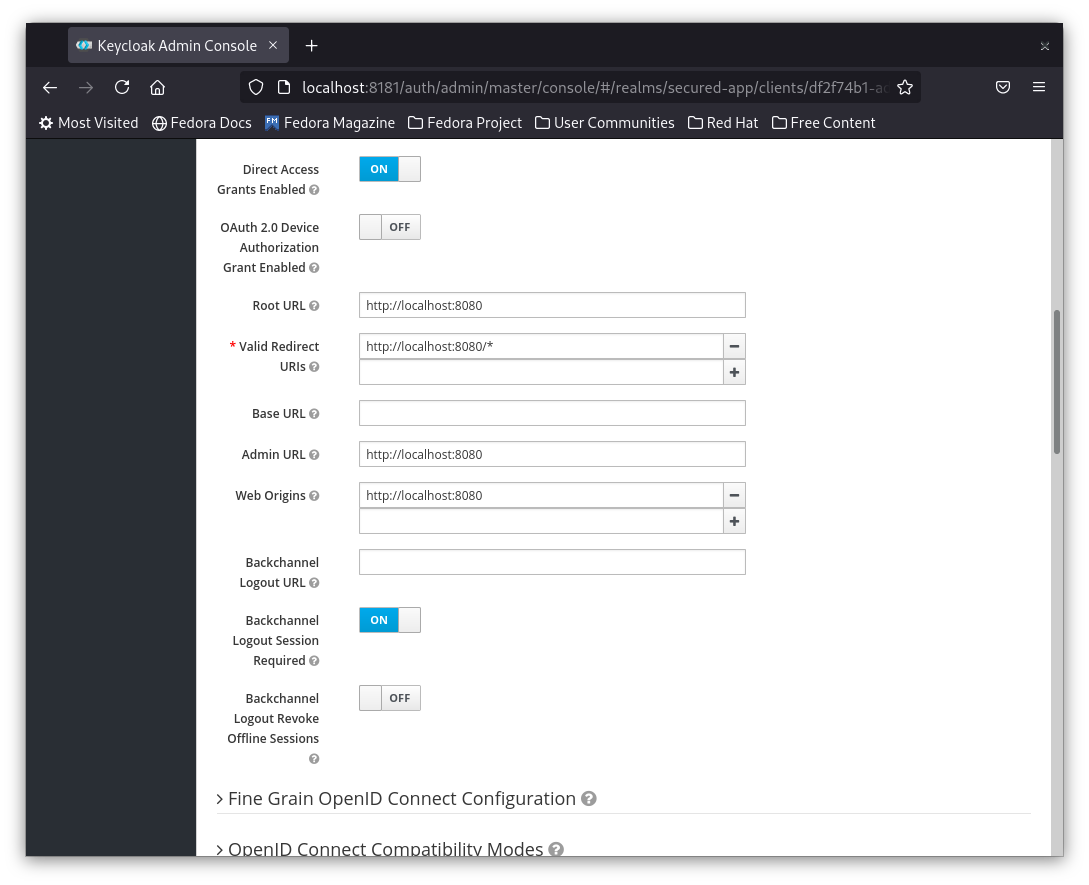
3- After hitting save you will be redirected to the client settings page. We will leave the defaults, but I encourage you to check what are the available options.
Note: In production you may need to use a confidential client i.e. secured by a client password. In this demo app we will be using a public client.
Secure a Vue Application
We're gonna create a simple vue app.
1- Use vue cli to initiate a project secured-vue as follows:
vue init webpack-simple secured-vue
cd secured-vue
npm install
npm run dev
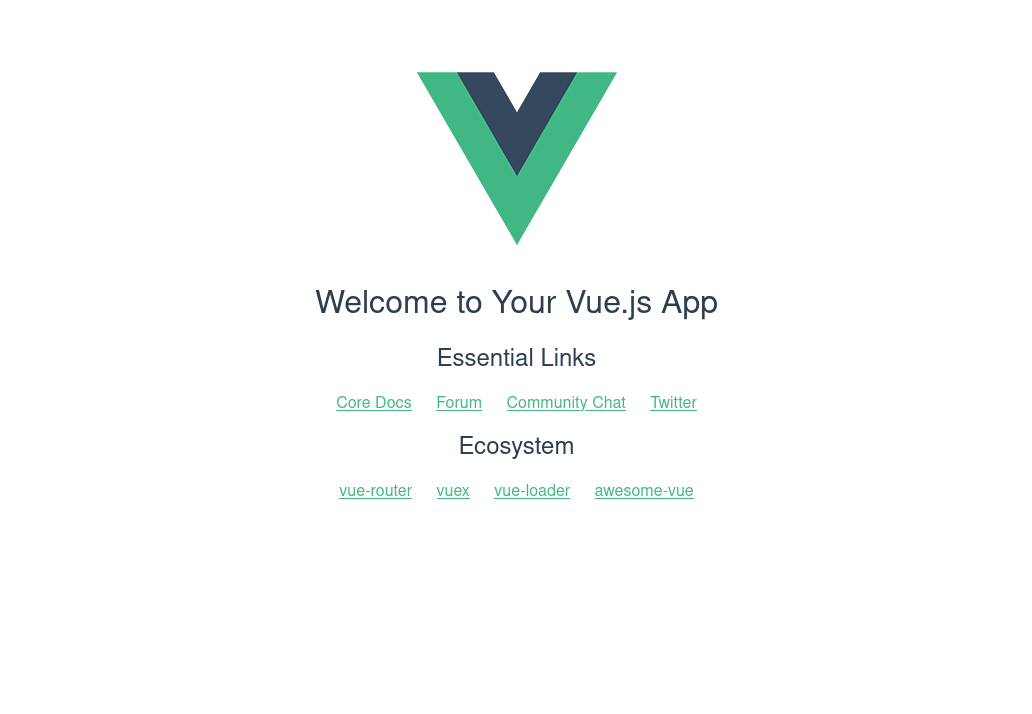
Your vue application should be reachable now on http://localhost:8080
Make sure that you can see the initial Vue screen
2- Now let's add the keycloak JS library and use it to secure our app.
npm install keycloak-js
3- Replace the code in main.js with the following:
import Vue from 'vue'
import App from './App.vue'
import Keycloak from 'keycloak-js'

let initOptions = {
  url: 'http://localhost:8181/auth', realm: 'secured-app', clientId: 'vue', onLoad: 'login-required'
}

let keycloak = Keycloak(initOptions);

keycloak.init({ onLoad: initOptions.onLoad }).then((auth) => {
  if (!auth) {
    window.location.reload();
  } else {
    console.log("Authenticated")

    new Vue({
      el: '#app',
      render: h => h(App, { props: { keycloak: keycloak } })
    })
  }


//Token Refresh
  setInterval(() => {
    keycloak.updateToken(70).then((refreshed) => {
      if (refreshed) {
        console.log('Token refreshed' + refreshed);
      } else {
        console.log('Token not refreshed, valid for '
          + Math.round(keycloak.tokenParsed.exp + keycloak.timeSkew - new Date().getTime() / 1000) + ' seconds');
      }
    }).catch(() => {
      console.log('Failed to refresh token');
    });
  }, 6000)

}).catch(() => {
  console.log("Authenticated Failed");
});
The above code is creating a keycloak object with initial options that has settings for:
- Keycloak server URL
- Realm
- Client ID
Keycloak fires the init function that returns a promise. Once the promise is successful, the it returns true passed in the argument auth
If auth returns as true this means that the authentication is successful and then it will redirect you to the main page.
If auth returned false. the application will reload again.
Extra code is added to automatically refresh the token.
Save the file and run the application again using npm run dev
4- Once your application browser page reloads you will see a login page as below.
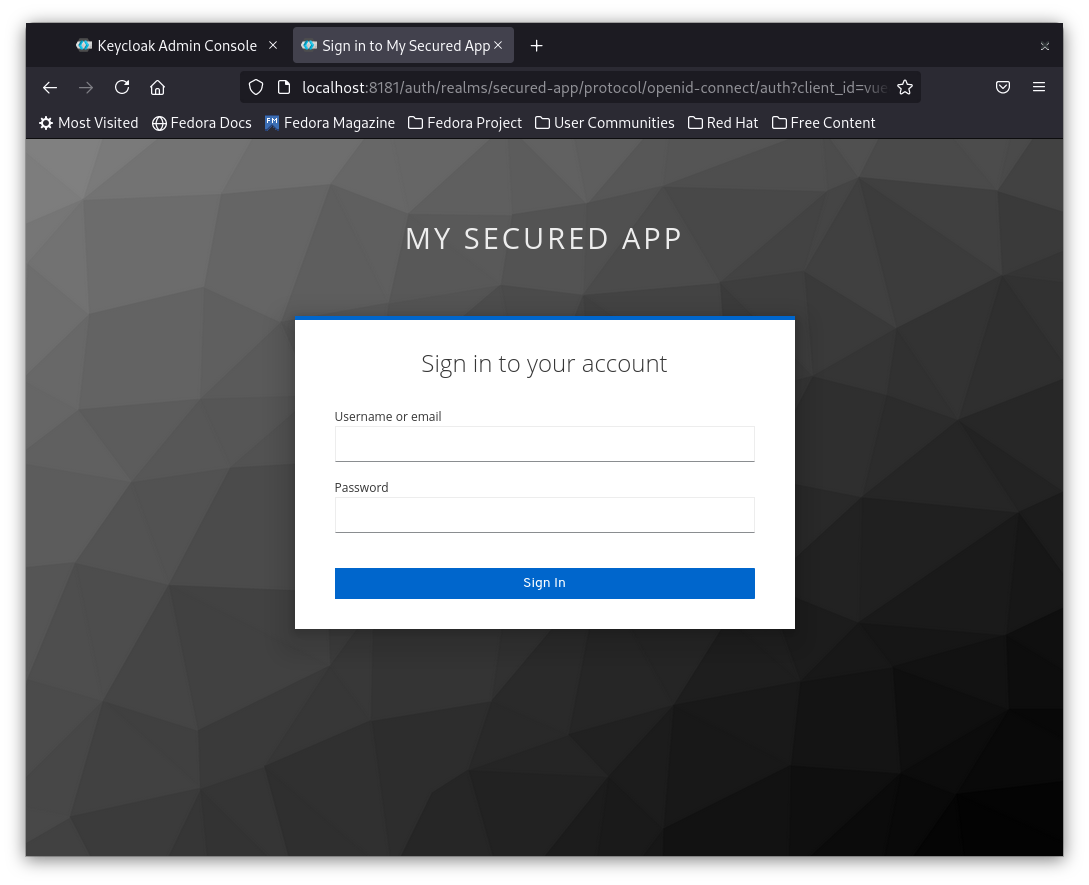
5- Try login with admin/admin you will get an invalid user.
6- Try login with the created user, in my case Aly, the application should allow you to view the default Vue app page.
If you refreshed the page you will not need to re-login, that's because the session is saved for this user. and the token is getting refreshed.
7- You can go to users in keycloak, select the user that you created Aly in my case and then click on Sessions
you should see the session that you used using the vue client as below.
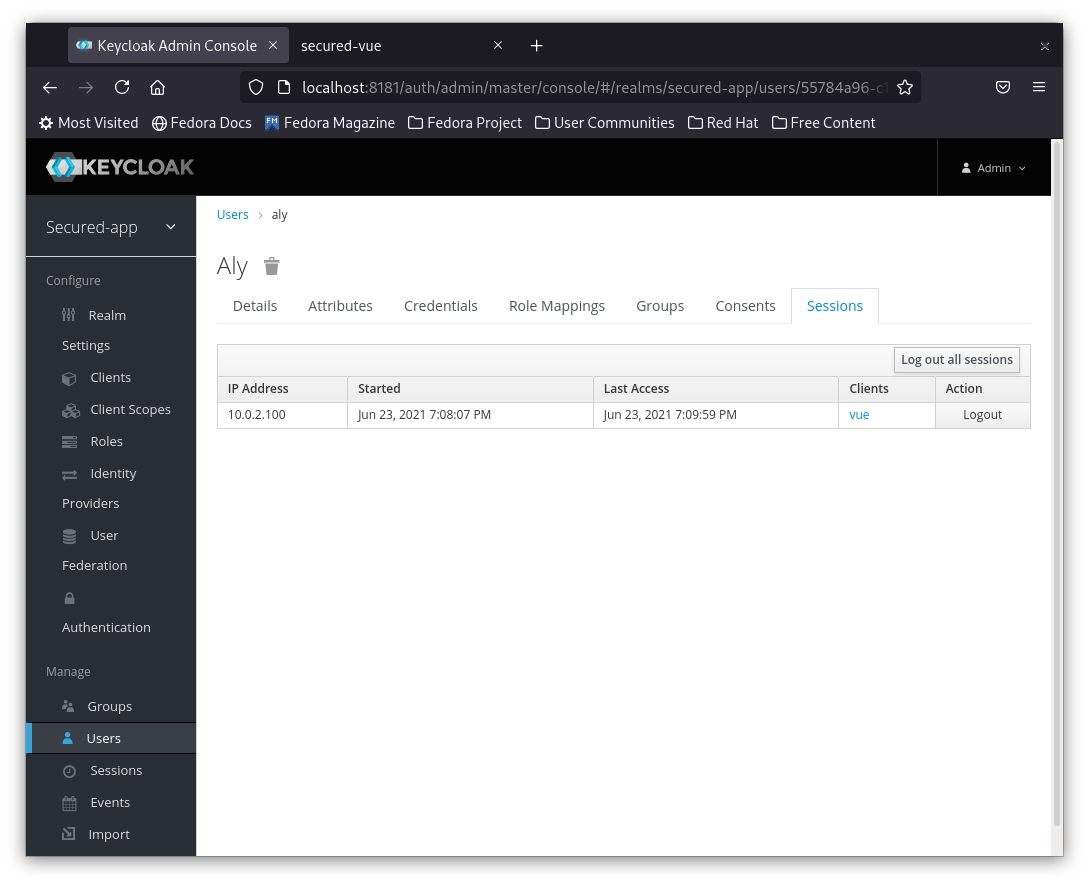
8- You can now try to Logout the session and you will find that your application is asking you to login again.
Congratulations, You secured your first app.
Secure a React app
1- First let's create a simple react app using
npx create-react-app secured-react-app
cd secured-react-app
npm install
2- Run your app and make sure it is reachable on the default url : http://localhost:3000
3- Install Keycloak JS library using the command:
npm install keycloak-js
4- Open src/index.js and replace the contents with the following:
import React from 'react';
import ReactDOM from 'react-dom';
import './index.css';
import App from './App';
import reportWebVitals from './reportWebVitals';
import Keycloak from 'keycloak-js'
let initOptions = {
  url: 'http://localhost:8181/auth', realm: 'secured-app', clientId: 'vue', onLoad: 'login-required'
}

let keycloak = Keycloak(initOptions);

keycloak.init({ onLoad: initOptions.onLoad }).then((auth) => {
  if (!auth) {
    window.location.reload();
  } else {
    console.log("Authenticated");
    ReactDOM.render(
      <React.StrictMode>
        <App />
      </React.StrictMode>,
      document.getElementById('root')
    );

  }
})

  // If you want to start measuring performance in your app, pass a function
  // to log results (for example: reportWebVitals(console.log))
  // or send to an analytics endpoint. Learn more: https://bit.ly/CRA-vitals
  reportWebVitals();
The code is very similar to the description In the above section. The only difference is that this time it will return a react app.
Notice: I am using the same vue client id here
5- Save the file and refresh the page you should see something similar to the below:
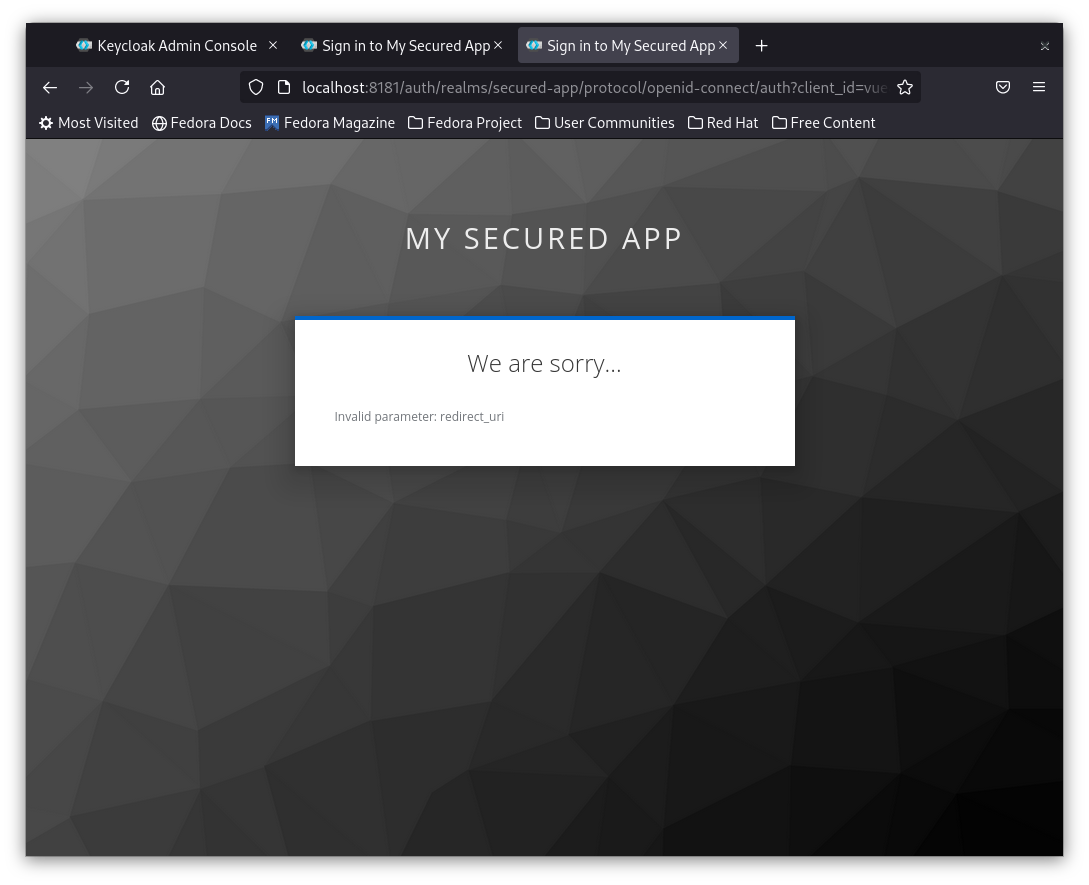
The reason this one is failing is that the redirect url configured in the vue client is pointing to Vue URL http://localhost:8080 while the React app is running on http://localhost:3000. Keycloak should send back the token and redirect the browser to a URL different from what the client is configured to. So it rejects the request to login.
Remember I mentioned to create different clients for different applications
6- Solution is simple: create another client to react. Same steps as in Add Client section, You just need to name it react and add Root URL of the React app: http://localhost:8080
7- Once done replace this line of code so next time it uses the newly created react client id:
let initOptions = {
  url: 'http://localhost:8181/auth', realm: 'secured-app', clientId: 'react', onLoad: 'login-required'
}
8- Now refresh and you should be directed to the login page.
Note: If you have your Vue app already logged in the login will be bypassed and it will consider you as already logged in. It is better to log out the session of vue before refreshing the react app.
Checking the token
Last thing we're gonna do is to check and validate the token received from Keycloak.
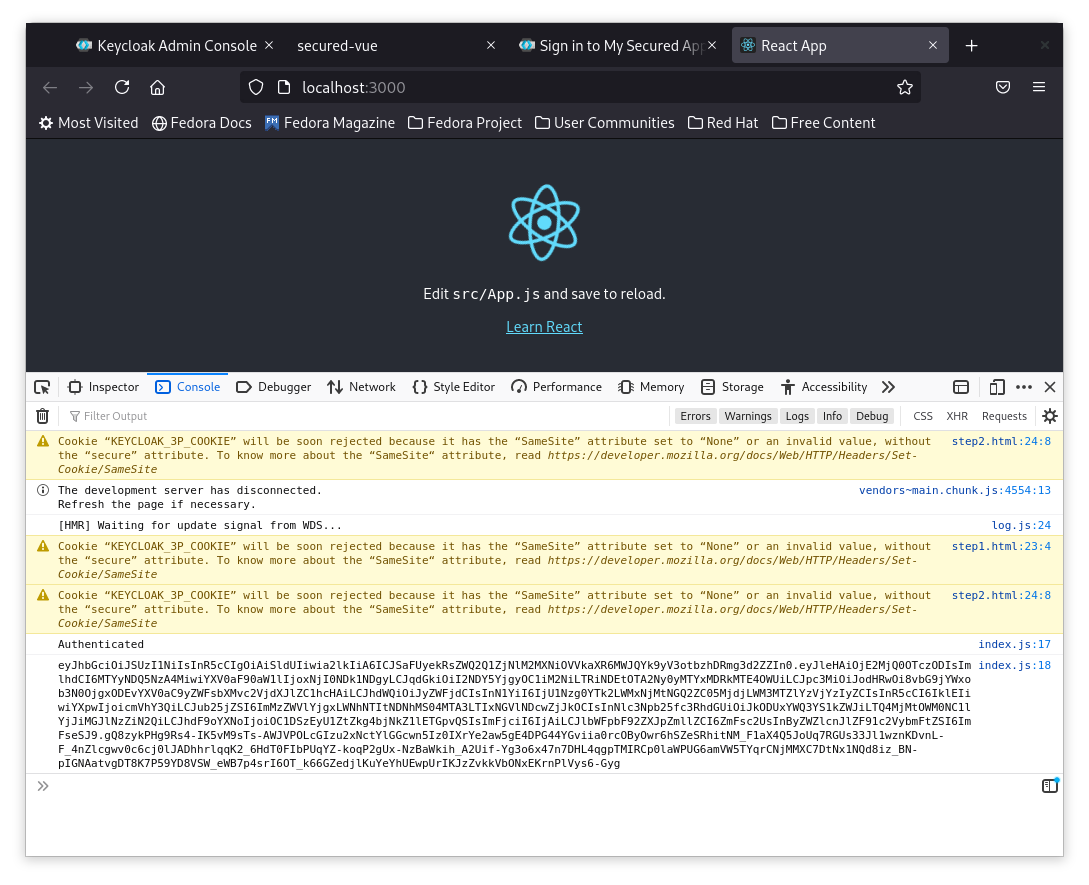
1- Use Either the React or Vue app to add this line of code just after console.log("Authenticated"):console.log(keycloak.idToken)`
2- Now try to login from the browser and open the developer's console.
You should see an long encrypted token printed as below:
3- Copy the id token.
4- Open a new browser and go to https://jwt.io
5- Paste your id token in the debugger encoded box.
6- Check the values in the right box of payload, and you should see familiar values you have already configured in keycloak.
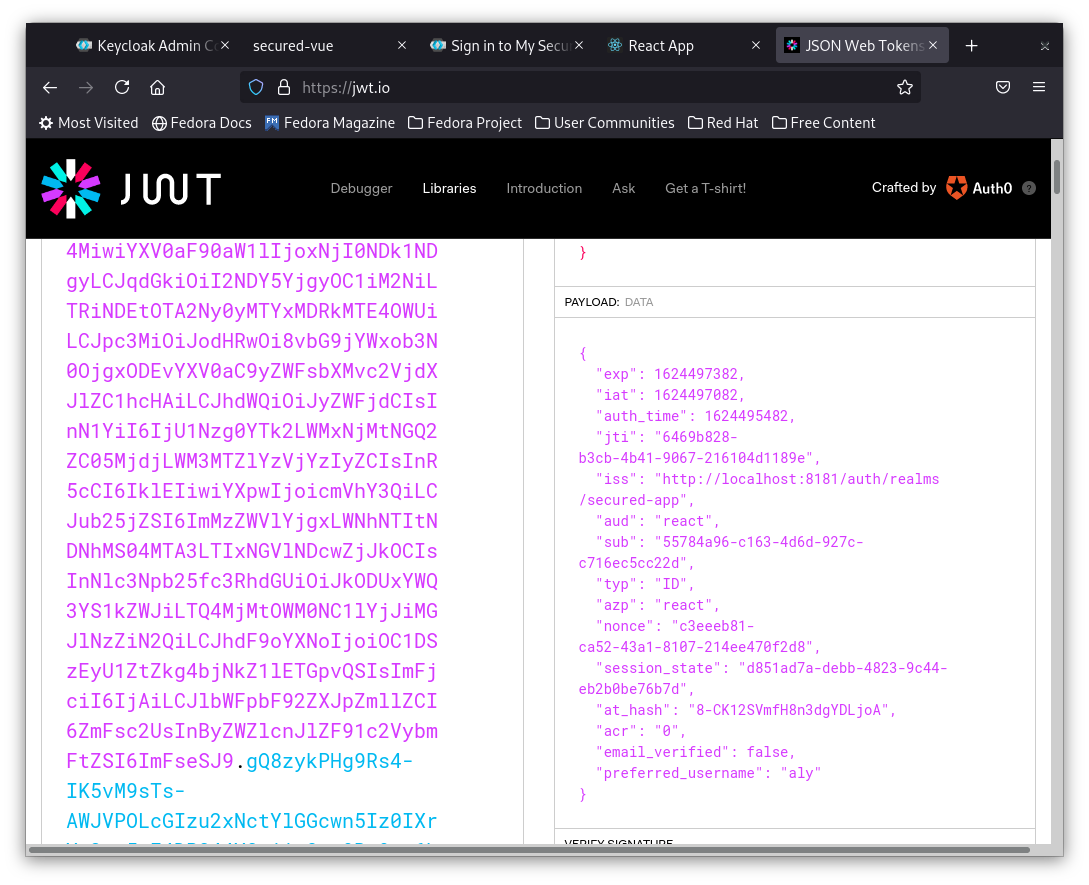
This is how the keycloak js client identifies the user.
Keycloak can also send more data but these are the basic ones.
Next time we can follow up on that to move the token to an API and use different roles.
Till then stay safe.